
Workspaces
A workspace is the environment an AI coding agent runs in — your repository, cloned and ready, with the tools the agent needs. In everyday use you rarely create one by hand: SAM provisions a workspace for you automatically when you start working in a project chat. This guide explains that automatic flow and the direct controls available for power users.
The Normal Flow: Workspaces Come From Chat
Section titled “The Normal Flow: Workspaces Come From Chat”You don’t start with a workspace — you start with a conversation:
- From the Dashboard, click Import Project and connect a GitHub repository.
- Open the project and describe what you want in the chat.
- SAM automatically provisions a workspace, runs your chosen agent, and streams progress back to you. Ask the agent to commit, push and open a pull request when the work is ready.
Provisioning takes a couple of minutes the first time, or seconds when SAM reuses a recently active (“warm”) environment. You never have to pick a server or wait at a terminal — the workspace exists to serve the chat.
See Idea Execution for the full chat-to-pull-request workflow.
Two kinds of workspace: Instant and VM
Section titled “Two kinds of workspace: Instant and VM”A workspace runs either as an Instant container on Cloudflare’s network or as a VM on a cloud provider. Which one you get is an agent profile setting:
- A profile whose runtime is “Instant container” → Instant. Starts in seconds and needs no cloud account, but has no
.devcontainerbuild, no Docker, and no automatic port exposure. - Anything else → a task on a VM, with your full environment.
A task you submit in SAM or with the CLI uses a VM unless its profile’s runtime is Instant, so a project that mainly runs tasks on VM profiles needs cloud compute. Work started through the Connector with an Auto profile, or none, runs on Instant when neither you nor the project has a cloud credential connected.
A VM belongs to you alone: SAM never places another person’s workspace on it, though several of your own workspaces can share one. That machine, not the devcontainer, is the security boundary, which is why your repository’s devcontainer settings, including Docker-in-Docker, are applied as written. See the workspace isolation model.
Everything below — providers, VM sizes, the terminal, stop/restart/delete — describes the VM path. If your sessions are starting in seconds and the agent can’t run your build tooling, you’re on Instant; see Instant Sessions for its behavior, limits, and how to pin a runtime explicitly.
Where your workspaces run: Bring Your Own Cloud
Section titled “Where your workspaces run: Bring Your Own Cloud”VM workspaces run on a real cloud VM. On the hosted platform, compute is usually provided for you, so you can start working without connecting anything. On a self-hosted instance, or when you want VMs billed directly to your own account, SAM follows a Bring Your Own Cloud (BYOC) model: you connect a cloud provider once, and every VM runs on your account.
SAM supports seven providers:
| Provider | Known for | What you connect |
|---|---|---|
| Hetzner | European cloud, great value | An API token with Read & Write access |
| Scaleway | European cloud, GPU options | An API secret key and project ID |
| Vultr | Global cloud, hourly billing | A Personal Access Token with IP access set to Allow All IPv4/IPv6 |
| Infomaniak Public Cloud | Swiss OpenStack cloud | An application credential ID and secret |
| DigitalOcean | Global cloud, simple droplets | A Full Access Personal Access Token |
| UpCloud | European cloud with global regions | A dedicated API subaccount username and password |
| Google Cloud | Google Cloud Platform | Workload Identity Federation, or a service-account JSON key |
Connecting a provider
Section titled “Connecting a provider”- Open Settings → Connections and start connecting a cloud provider. (The Cloud Provider tab lets you fill in each provider’s form directly instead.)
- Pick a provider — each card shows a one-line description to help you choose.
- Use the linked provider console to create the credential, paste it into the form, and save. SAM encrypts the credential at rest and validates it before the first VM is created.
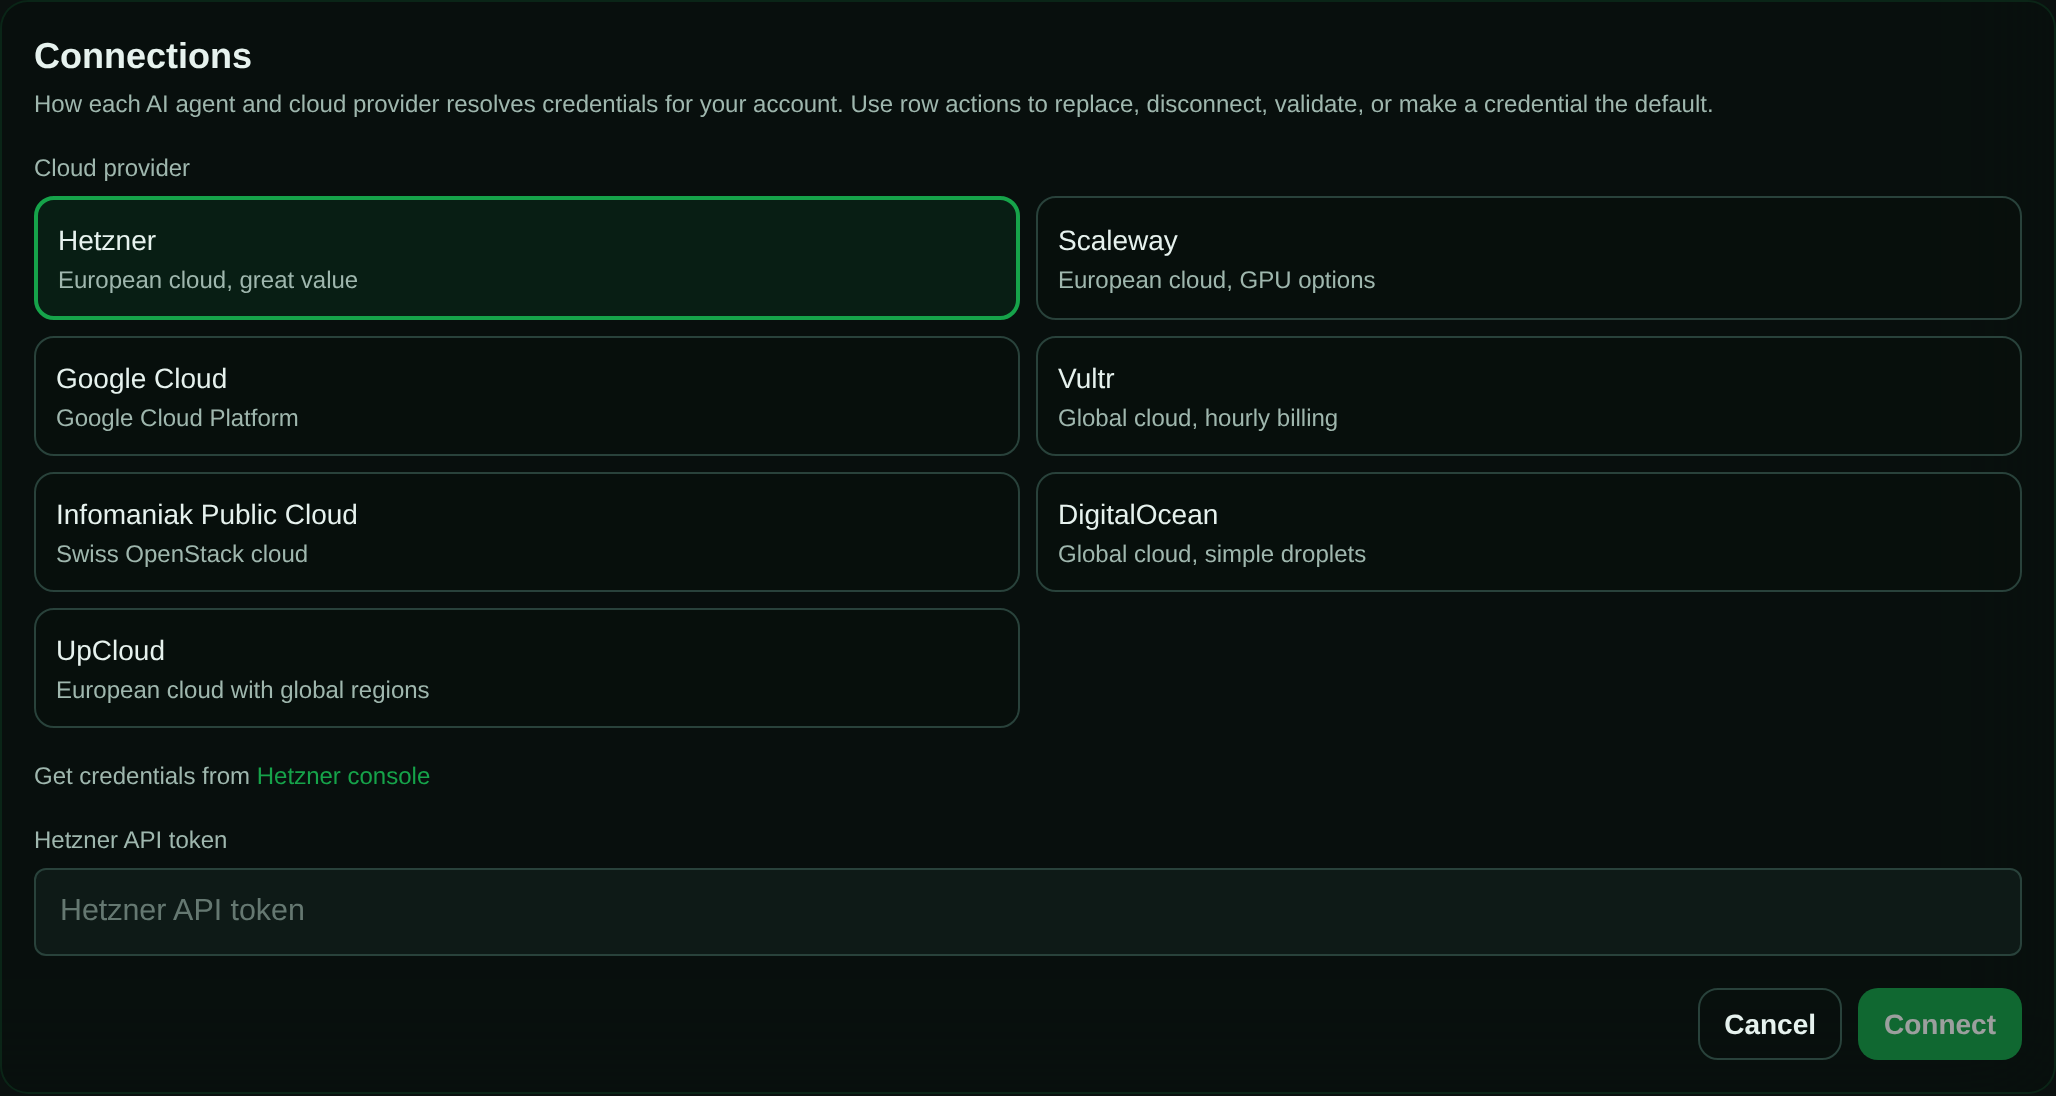
Once a provider is connected, SAM uses it automatically when it provisions workspaces. You can connect more than one and set a default provider (and region) per project in project settings. For per-provider VM sizes, regions, and example pricing, see the Self-Hosting guide.
Choosing an environment size and profile
Section titled “Choosing an environment size and profile”When you start a chat you can optionally choose:
- Agent profile — which agent, model, and settings to run (see AI Agents).
- Workspace profile, a setting of the agent profile you pick — a Full environment that builds your project’s
.devcontainer(best when the agent needs to run your stack), or a Lightweight environment that starts faster (best for quick questions and code exploration). Workspace profile and runtime are separate choices: Full has no effect on an Instant session, which never builds a devcontainer. To get your devcontainer you need a VM workspace. - Resources — how much CPU, memory, and disk this piece of work needs, and whether it wants a machine to itself. Leave it blank to inherit the profile, project, and platform defaults. See Compute Pools.
Using a Workspace Directly
Section titled “Using a Workspace Directly”Most work happens through chat, but every workspace also has a direct view for hands-on control. You’ll find running workspaces under Nodes / Workspaces in the navigation.
Terminal
Section titled “Terminal”Open a workspace to get a browser-based terminal — a full interactive shell that behaves like a real terminal.
- Session persistence — terminal sessions survive page refreshes
- Multiple tabs — run several shells alongside agent chats
- Copy/paste and resize — standard shortcuts work; the terminal fits the window
Agent chat in a workspace
Section titled “Agent chat in a workspace”Click + New Chat to start an AI coding session directly in the workspace. If you’ve connected more than one agent, you can choose which one to use. Each chat runs in its own tab alongside your shells.
Managing Workspaces
Section titled “Managing Workspaces”Stopping
Section titled “Stopping”Stop a workspace to power down its environment while keeping the record so you can restart later. Stopped workspaces don’t incur compute charges.
Restarting
Section titled “Restarting”Restart provisions a fresh environment and re-clones your repository.
Deleting
Section titled “Deleting”Delete permanently removes a workspace and cleans up everything associated with it.
Machine sizing
Section titled “Machine sizing”You do not pick a server. You state what the work needs — vCPU, memory, disk, and optionally an exclusive node — and SAM picks a machine that satisfies it from the instance types your compute pool permits.
Requirements are inherited field by field, so you only set what you care about:
task → trigger → skill → agent profile → project → platform defaultThe platform default is 2 vCPU, 4 GB RAM, and 40 GB disk. Set a project baseline in Project → Settings → Infrastructure → Default Resources, a per-profile or per-skill default in their editors, or a one-off override from the Resources control next to the chat composer.
SAM provisions the exact provider instance type the pool selected, and records what the machine
actually reports about itself. A node’s detail page shows both: Observed hardware (from the
cloud provider) next to the Configured offering the pool asked for. When a provider omits CPU,
memory, or disk details, they are recorded as unknown rather than inferred
(packages/providers/src/native-vm-config.ts), and a machine SAM cannot measure is never given
work.
Offering selection accounts for the memory held back for the host itself. With the default 512 MiB reserve, a 4 GiB offering can host at most a 3584 MiB workspace reservation, so a request for a full 4 GiB needs a larger offering. If no allowed offering fits, submission fails with a resource-capacity error before anything is provisioned, rather than starting a machine that cannot hold the work.